Search This Blog

Monday 15 June 2020

Review: Camelbak Repack LR 4 hydration waistpack


I have a history with Camelbak product that stretches all the way back to the early-90s original. Along the way I’ve worked my way through the Rogue, H.A.W.G and Cloudwalker. In recent years however I’ve been getting less use out of them. A combination of constantly evolving bike bags and bikes with umpteen bottle cages have made the rucksack capacity Camelbak less of an essential. So if your frame bag has robbed you of bottle cage space, the Camelbak Repack LR might just be what you’re looking for…

It’s not a bumbag

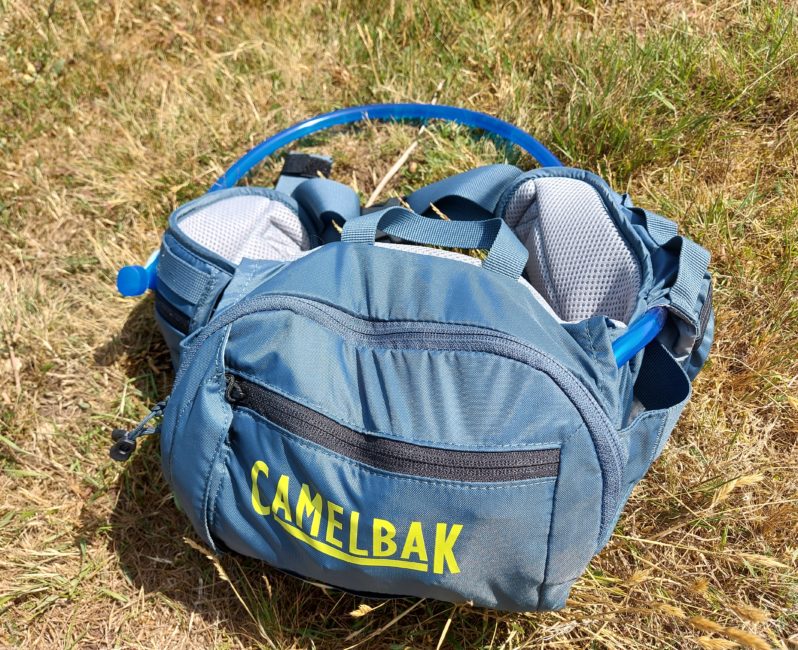
The Repack LR is a waistpack that’s part of Camelbak’s LR, or Low Rider range. As the name suggests, they all store their water at waist level. If like me you haven’t bought a new Camelbak in years then you’re in for a surprise! The faff of filling/drying a bladder has been greatly reduced with the new design. The hose can be removed with a quick-link while the bladder remains watertight. There is also a handle integrated into the filler cap mouth. If you’ve ever struggled to fill up at an outside tap and keep the mouthpiece out of the dirt you’ll appreciate this setup.

The Repack’s reservoir can store 1.5 litres (or 50 oz in old money) of water, comfortably matching a pair of bottles then! The bite-valve features an on/off valve and even when on no amount of rough riding lead to any leakage. The hose clips to the pack’s belt using a magnetic tube-trap. To begin with I found this tricky to replace when on the move but it soon becomes second nature. It’s certainly less trouble than trying to replace a bottle into a cage under a frame bag or on a fork leg!

Crux resovoir

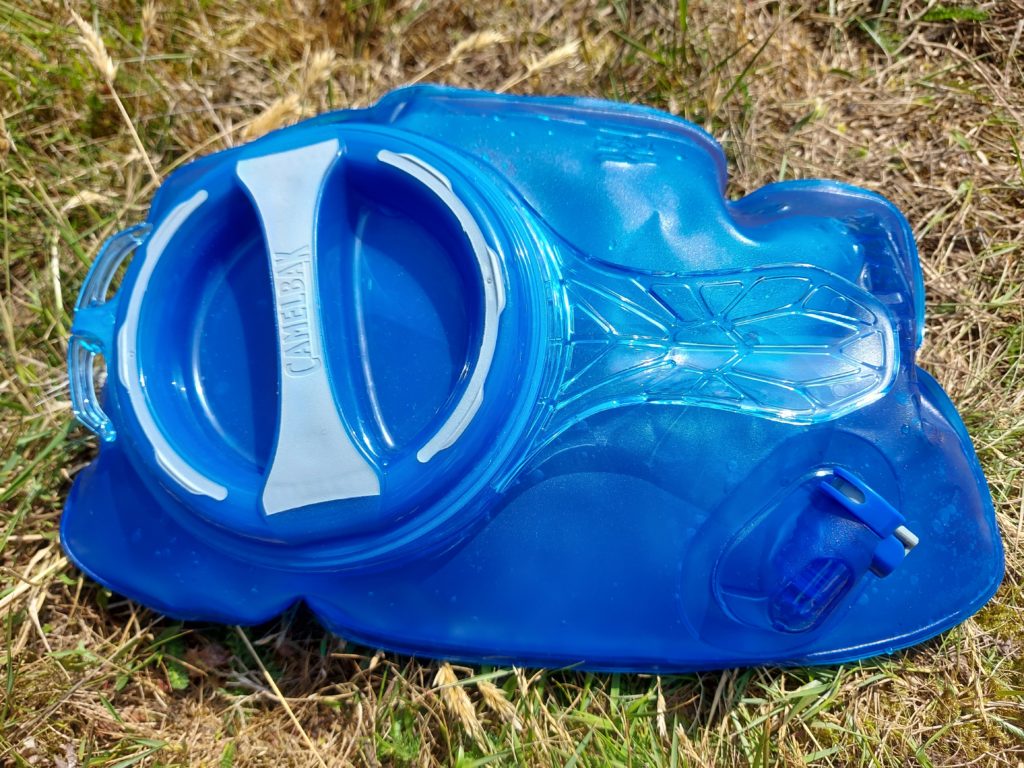
The Crux reservoir, holding water with the hose removed!

There are handy pockets on both sides of your hips. On the left a zipped one that was perfect for keys and on the right one with just elastic and an overlapping flap. While I could happily fit a 700c innertube in them there was no way they’d take a modern smartphone. Both sides of the belt have the same ladder-stitched strapping so you can switch the hose-clip to the whichever side you prefer.

Hydration bite valve

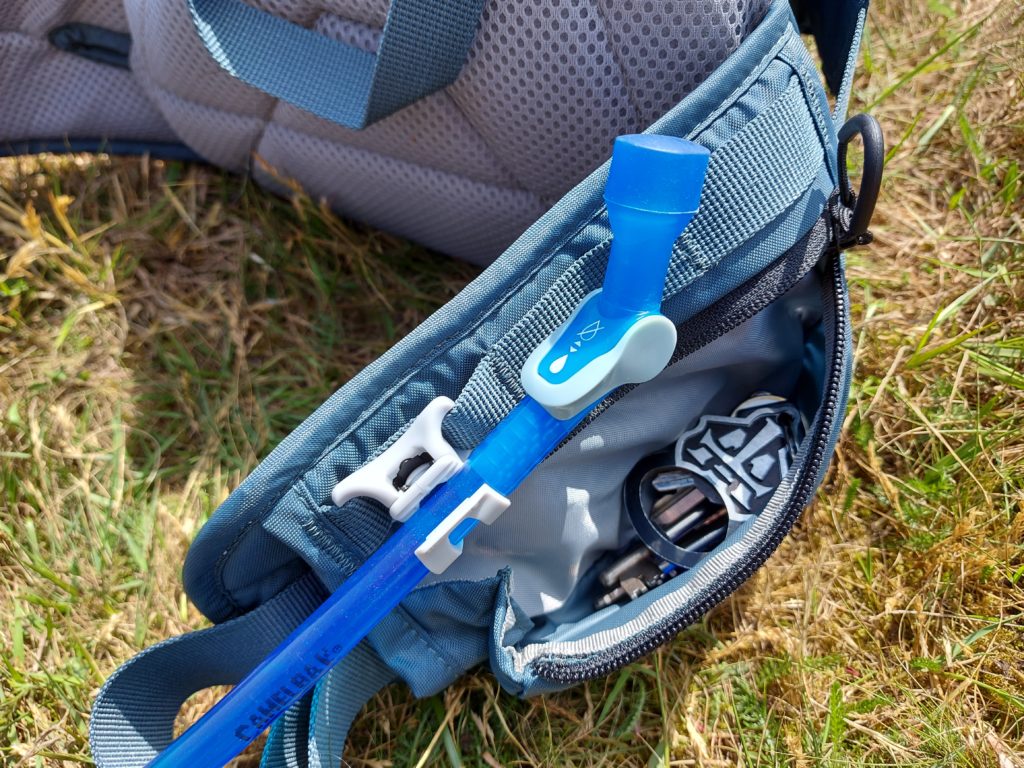
Secure hose retention and handy zipped pocket

Comfort

Another clever feature of the belt is that the main strap passes under  the pockets. Whatever you’ve got stored won’t interfere with or get crushed if you cinch the belt tight. Another upside is that I found the Repack to stay in place with a relatively loose belt. There was no need to cinch the belt so hard you give yourself a beer-belly look-alike! The Repack stays put both when spinning a fast cadence or bashing down sun-baked ruts. There is plenty of padding around the lumber and belt and perforations prevent an excessively sweaty feel.

Camelbak Repack

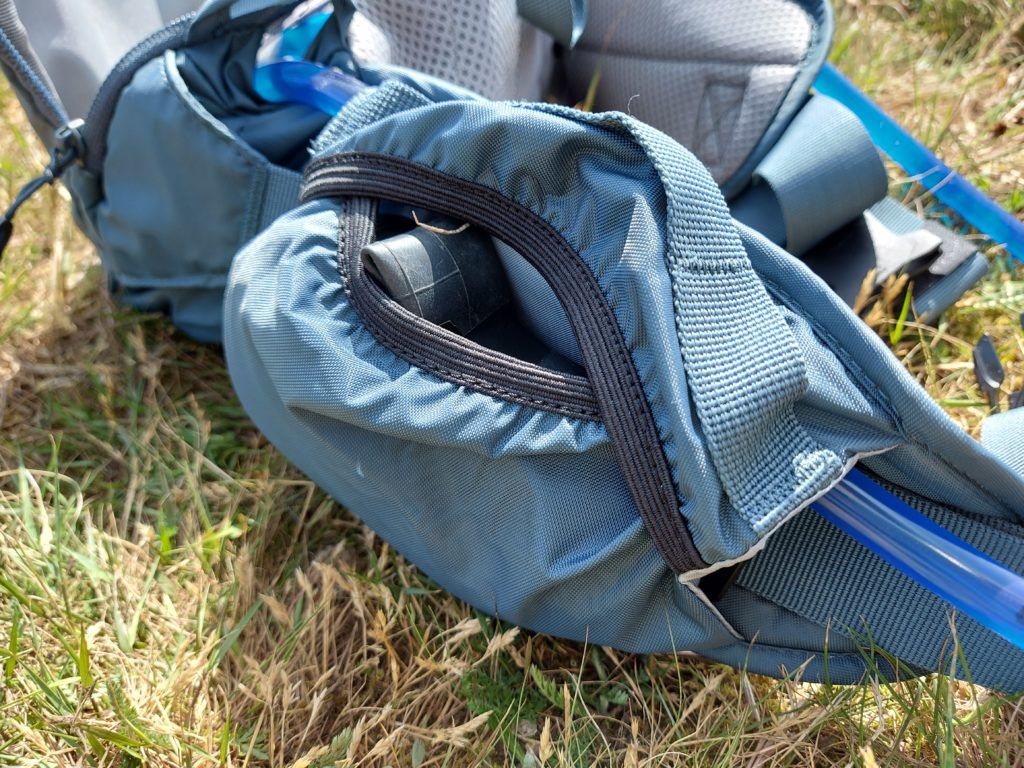
Elasticated pocket for quick-access for bulkier items, but not your phone…

Further storage

Inside the main compartment there is a central divider to separate the space for the water and other kit. Undoing the zip creates a wide opening so getting the reservoir in is a piece of cake. With the full 1.5 litres on board there’s an additional 2.5l for kit. Room enough for a tool roll and mini-pump without forcing the zips. There is an additional small pocket under the camelback logo. Inside are a series of dividers (So I could do away with the tool-roll!) and a zipped mesh pocket with a key-clip. The exterior zips move horizontally so the pocket opens like a book and velcro flap ensures the zip-pulls can’t catch and pull open inadvertently.

Camelbak Repack

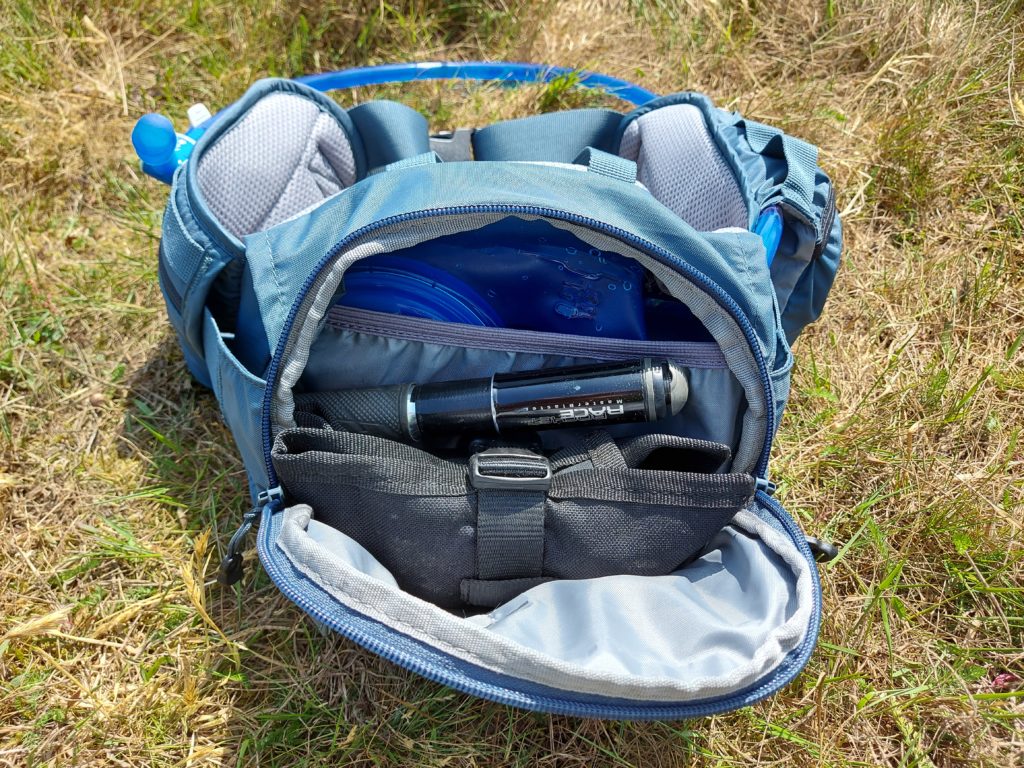
Room for all the essentials in the Camelbak Repack

Camelbak Repack: Summary

I found the Camelbak Repack to work really well for a number of scenarios. For quick rides it holds all the essentials, and on longer rides it increases your overall capacity, conveniently returning what has been lost through fitting a frame bag. Compared to a rucksack there’s no sweaty-back or shoulder ache to contend with. The Repack can also be spun-around to access the pockets without having to remove it, handy for grabbing your camera or a snack in a hurry. The clever design shows Camelbak haven’t been resting on their laurels, if only the side pockets could take my phone! All said, the Repack looks set to join me on a lot more adventures in the future.

Camelbak Repack

The silver-loop is reflective and can take a clip-on light

Wednesday 3 June 2020

Review: Genetic Driser 4-10 drop handlebars


Genetic Driser 4-10

Drop-what?

25 years on from riser-bars having their second coming on mountain bikes, Genetic have released their new Driser 4-10 drop-bars. Joining the original Driser 4 road  and Driser 16 gravel bars there is a clear family resemblance. In common with its predecessors, the Driser 4-10 is a drop-riser, that is to say a drop bar with a rise on the top section. At first this seems counter-intuitive but there are situations where this could come in handy. Perhaps to get comfy you need more height than your steerer can accommodate, or perhaps you just want to avoid the huge stack-o-spacers look.

Paired with gel-pads the drisers are a seriously comfy bar

On the bike

The 4-10 part of the Genetic Driser name relates to the 4 degree flare on the drops and the 10mm rise from the centre. The original Driser shared the same flare but came with a 20mm rise. Another way that Drop-bars are aping MTB trends is by getting wider. The Genetic Driser 4-10 is available in five widths from 400 to 480mm in 20mm increments.

The tops of the Drisers are an interesting shape. Normally you’d refer to it as aero, but that’s probably not the biggest concern for someone hoping to raise their bars! I tried our test set with some gel-pads and it made the drisers almost a replacement for flat handlebars. The 4° flare seems tame compared to  a Woodchipper, but adds 16mm width on the drops. So for an Audax, back-roads bash or gravel-lite© it’s enough to help your elbows flex outward. The drisers are made from 6061 alloy and (even without the gel pads) didn’t feel overly harsh or excessively flexible.

Genetic Driser 4-10

Roomy & practical with a hint of flare!

Aside from ride feel the drisers have another couple of handy features. There are channels underneath to help recess the cables and also maintain a comfy shape when gripped. The semi-aero flat-tops leave a bit more room for GPS & light mounts, useful for bars that aim to help you stay out longer! At £44.95 the Drisers compare favourably to rivals and offer a broader width range. If you have some big rides planned, or a bike that’s too compromised for regular use, the drisers could be the bars to open up your options.

Specifications

  • 6061 Aluminium tubing
  • 40/42/44/46/48 cm Widths
  • 10mm rise
  • 70mm reach
  • 4° Flare
  • 115mm drop
  • 31.8mm stem clamp diameter
  • 23.8mm main tube diameter
  • Laser etched logos on a sand blasted and black anodised finish

Tuesday 2 June 2020

Review: Giro Agilis MIPS helmet


As gravel bikes straddle the middle ground between road & mtb, the associated kit begins to do the same. Road helmets ache to be aero while MTB lids sprout peaks and chin guards. If like me you’re unlikely to be putting out some serious wattage at the DK200, your priorities are different. Decent ventilation, and some additional protection as an off-road tumble is always more likely than on smooth black-top. The Agilis MIPS from Giro is aimed squarely at the all-road market looking for this blend of speed & safety.

Construction

The Giro Agilis helmet uses the familiar polystyrene construction you’ll find in most helmets. The first thing that stood out to me was that none of the outer faces of polystyrene are exposed. So scuffs and dents from daily use will be fended off by a tougher polycarbonate shell. This can only help the helmet’s longevity.

Giro Agilis

Why so serious?

Fit & comfort

As we say in all our helmet reviews, any comments on fit have the caveat that all human heads are different shapes. One thing that everyone can probably agree on is that good ventilation is a must. Here the Giro Agilis does well, and in the pics below you can easily see both my head, and some daylight through the vents. These combined with the generous foam pads meant that when working up a sweat it doesn’t run into your eyes. Another aspect of fit that thankfully has been important of late is compatibility with sunglasses! My Oakley Monsterdogs have the chunkiest frames of all my sunnies and play nicely with the Agilis. Neither push each other lopsided when worn together!

Giro Agilis

Good ventilation and clearance for big sunnies!

Adjustment

Looking inside the Giro Agilis you can see the Roc Loc 5.5 MIPS cradle. For those of you unfamiliar with MIPS it’s a system that aims to reduce rotational brain injuries. Once the main body of the helmet has absorbed the initial impact the MIPS liner allows your head to rotate within the helmet. This is particularly important when your head hits something at an angle. Let’s face it, you’re unlikely to hit anything perfectly on the level. Of course I can’t verify the effectiveness of MIPS, what I can do is say that the system doesn’t make the helmet uncomfortable or more difficult to adjust. In fact I was hugely impressed by the level of comfort offered. The straps are easy to adjust and stay put while the Roc Loc adjuster has enough fine-tuning to allow a custom fit. Crucially I could adjust the Agilis so that it stayed in place without feeling like my skull was being compressed!

MIPS view of Giro Agilis

Excellent adjustment, and comfort without bulk.

Summary

The Agilis was a hit from the get go. It’s comfortable, light, and very easy to adjust. The Agilis mixes the best of road & MTB helmets without compromise. The best helmet is perhaps the one you don’t notice and you’re happy wearing. Retailing at £89.99 I feel the Agilis represents good value for money, considering the excellent fit, finish and MIPS cradle. If you like the design of the Agilis MIPS but aren’t convinced by the MIPS system then a standard Agilis is also available. It retails for £69.99 and comes in the same seven colourway options. Personally, spreading that additional £20 across the many hours I’ll wear this helmet for makes the extra expense a no-brainer. Ahem.

It’s also worth mentioning that currently Giro are supporting NHS & key workers by offering a 30% discount off their range of products. You can read more about it HERE.

Rear view of the helmet

The Agilis extends lower than your average road lid