Search This Blog

Tuesday, 28 July 2020

Review: Jo Burt Signature handlebar tape by Kinesis Bikes


Kinesis Jo Burt signature handlebar tape

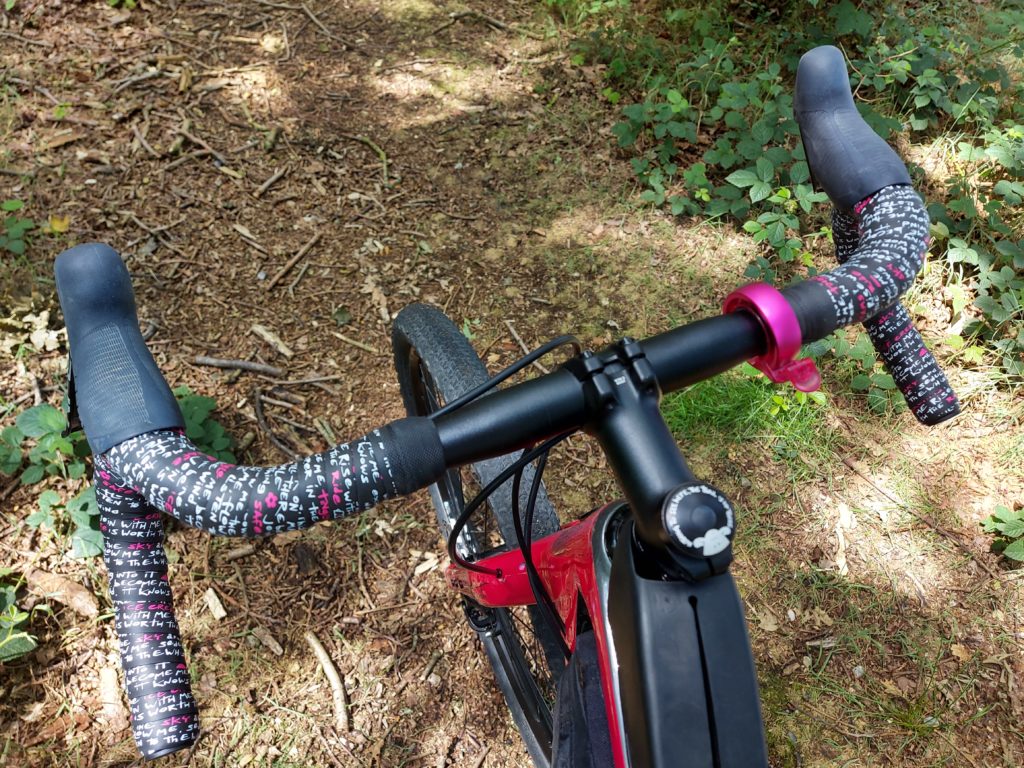
I saw two shooting stars last night, I wished on them, but they were only satellites. It’s wrong to wish on space hardware, but in this case my wish was answered. If you’ve read my account of the Atlas Mountain Race you might remember that I suffered a horrendous and very messy nose-bleed. So it was very fortunate that a recent *thud* on the doorstep of ADVNTR Towers was delivery of fresh bar-tape courtesy of Kinesis Bikes! And not just any old tape, but the Jo Burt signature edition! Not only could I consign the old tape to the bin, the Kinesis tape looked a perfect match for my Salsa Cutthroat.

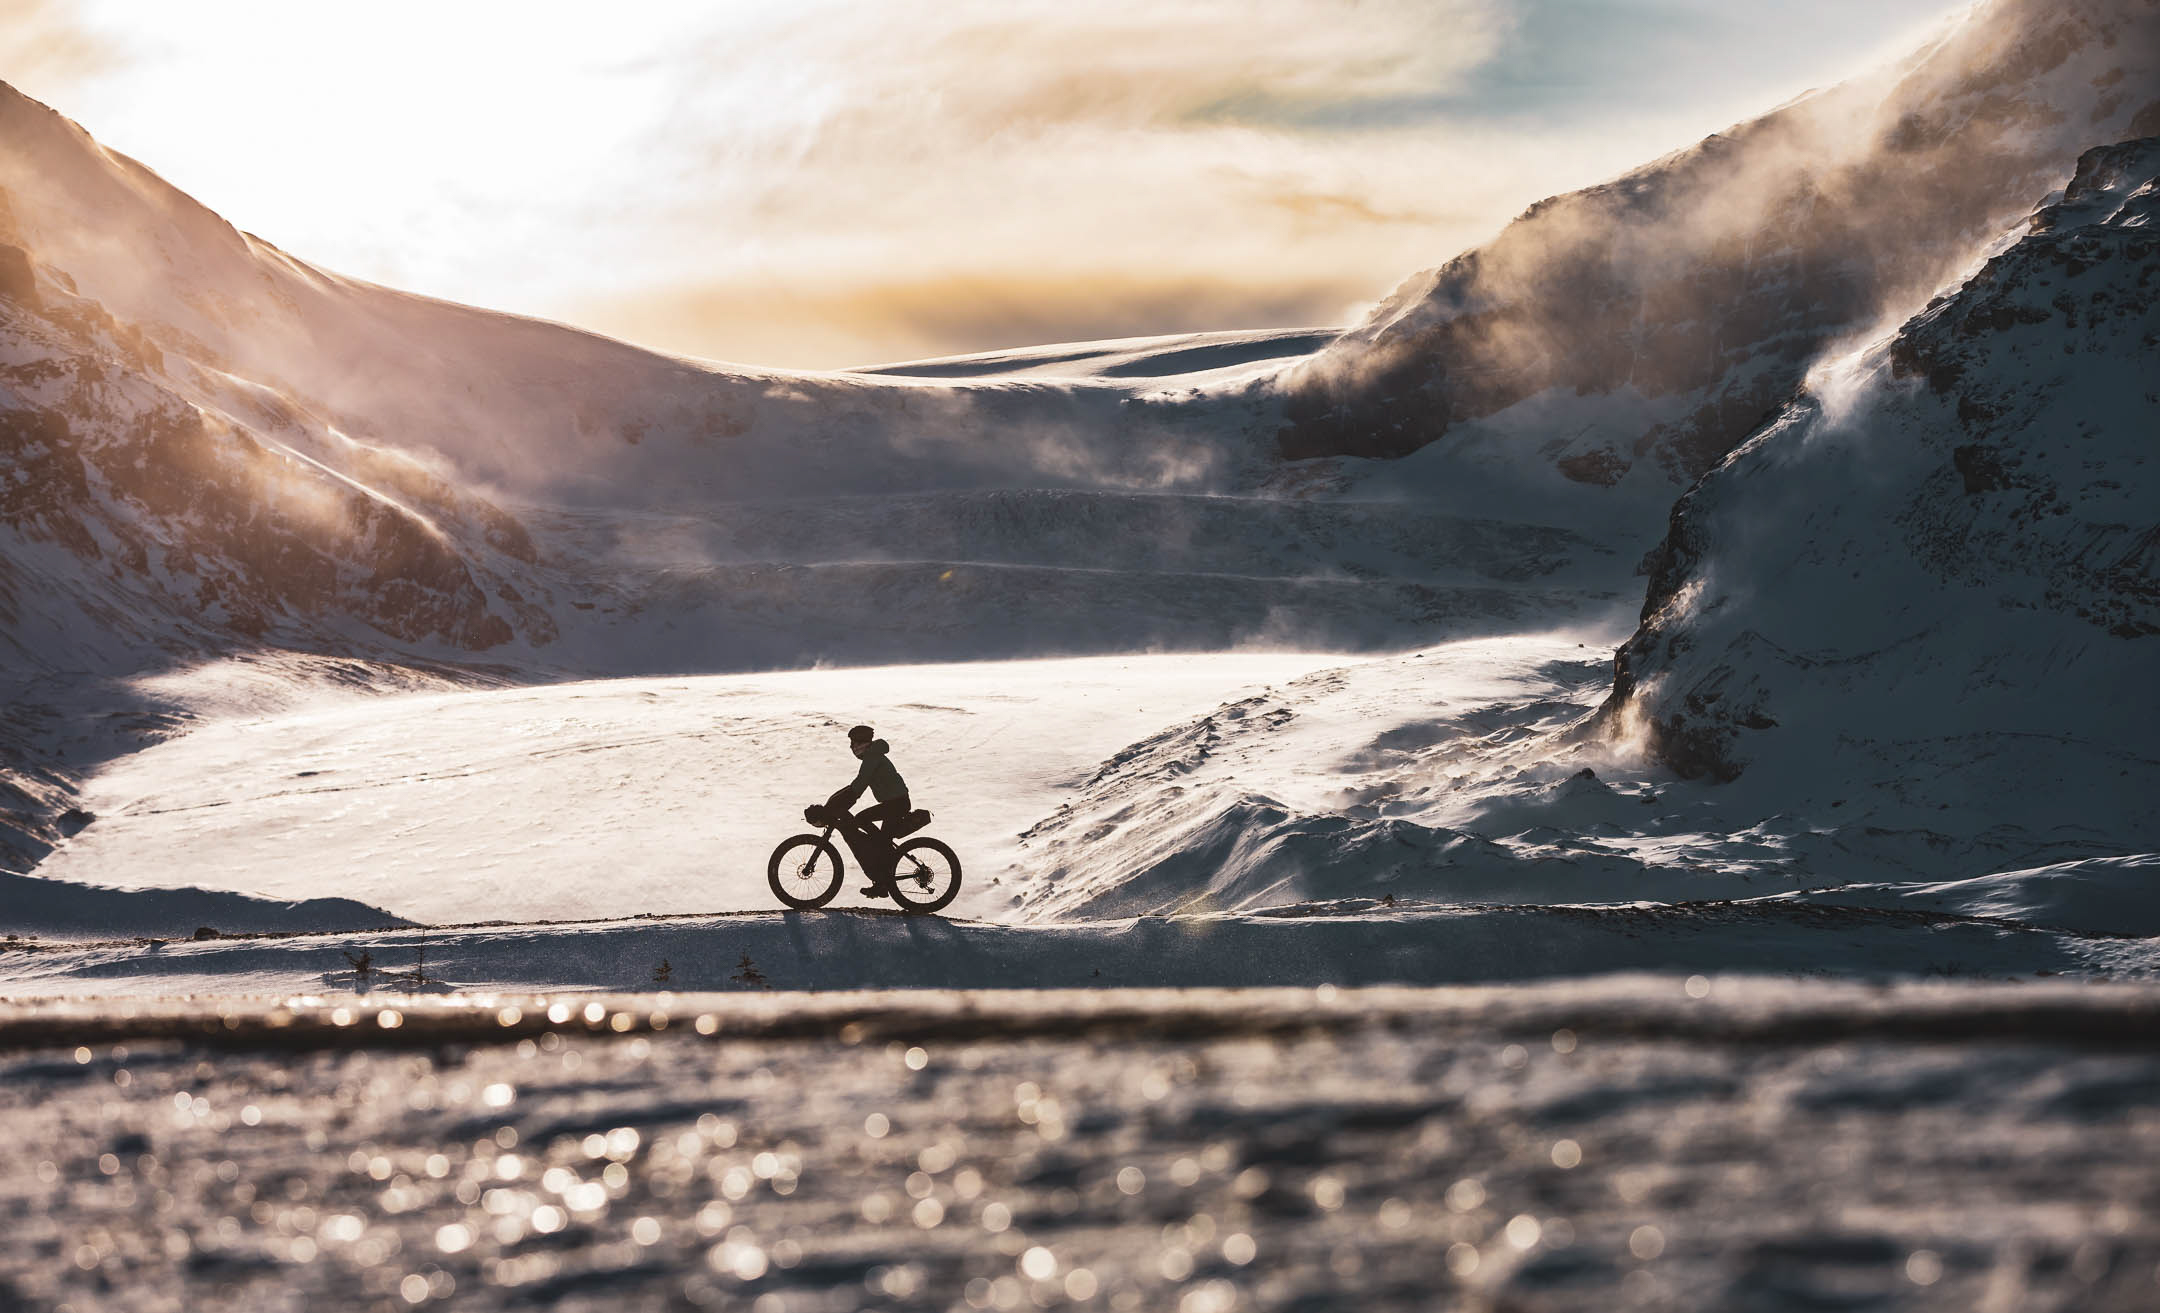
Rely on flower power to fly along the trail!

The man behind the design

Jo Burt has been a constant on the cycling scene for 30-odd years, as an author, illustrator and Transcontinental racer. Having been bitten by the mountain biking bug in the early 90s, it’s Jo’s creation Mint Sauce that I associate with the endless summers and crazy antics of my youth.

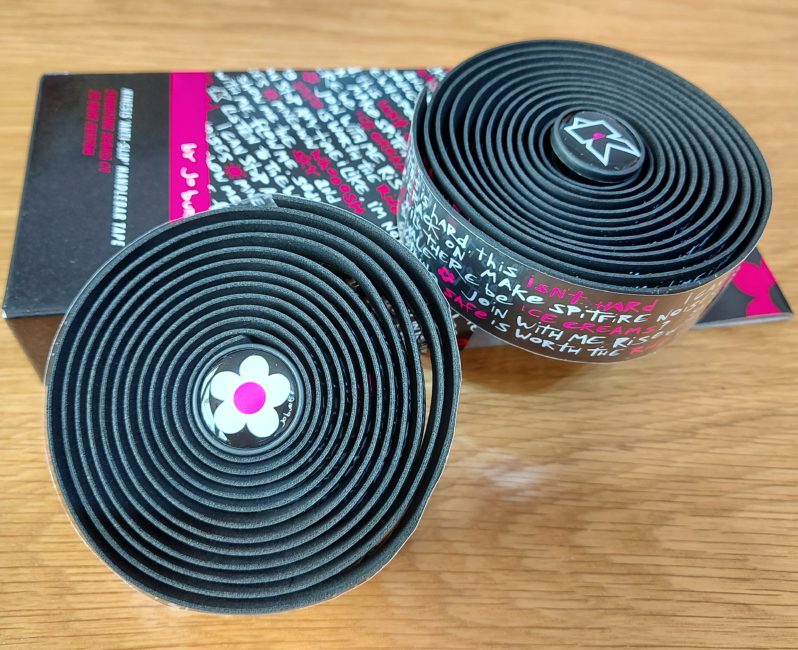
The whimsical phrases woven throughout the strip are a large part of their appeal. Mint isn’t featured on the bar tape, but a series of similarly evocative quotes are, all in Jo’s trademark script. I could repeat them here but it would spoil the surprise.

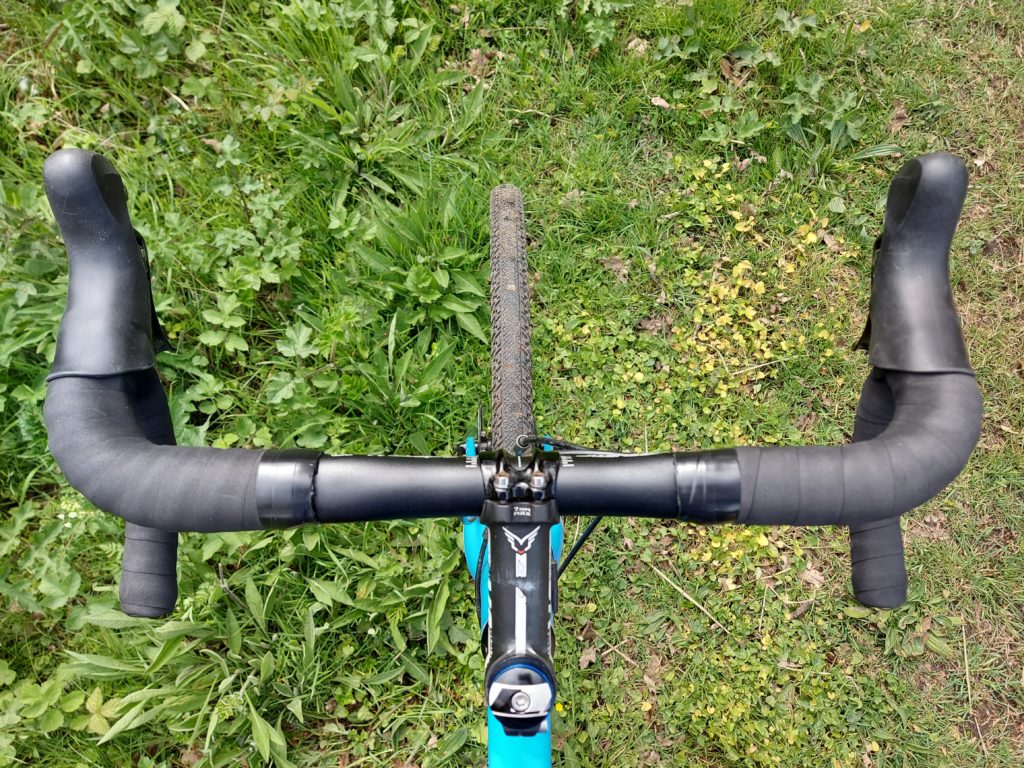
In the box are the two rolls of tape, two finishing strips and a pair of bar-plugs. One with the Kinesis logo, the other with the instantly recognisable flower icon. Kinesis describe the tape as velvet touch  but don’t confuse this with a textured tape that will trap grime, it has a smooth, yet grippy finish.

Kinesis Jo Burt signature handlebar tape fitted to Salsa Cutthroat

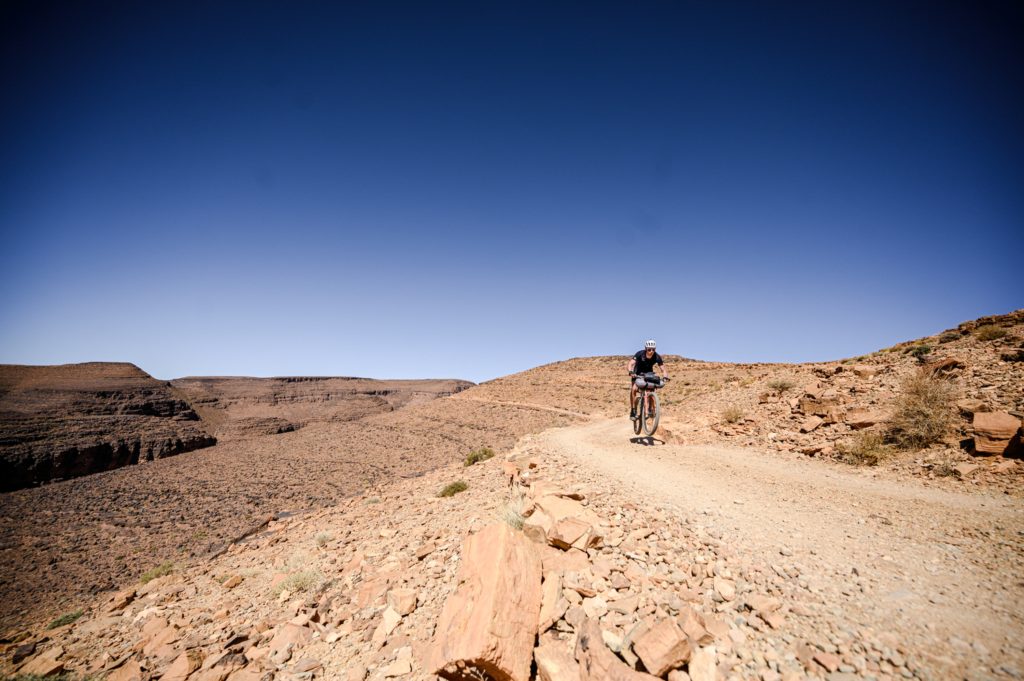
Crest that climb with motivation inscribed on your bars.

Fit & finish

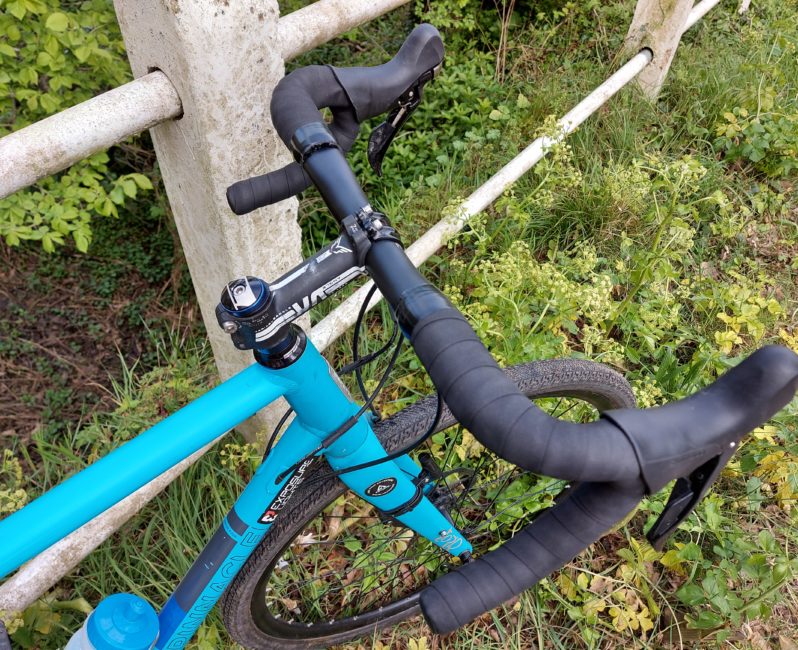
As well as a grippy surface, the tape features a Vex gel backing that provides cushioning and grip. So peeling off the backing tape doesn’t reveal an all-or-nothing glue. Whether a perfectionist, or disaster prone, you’ll be pleased how this tape can be repositioned. It has just the right amount of stretch to mould to the drop bars curves without thinning or deforming the graphics.

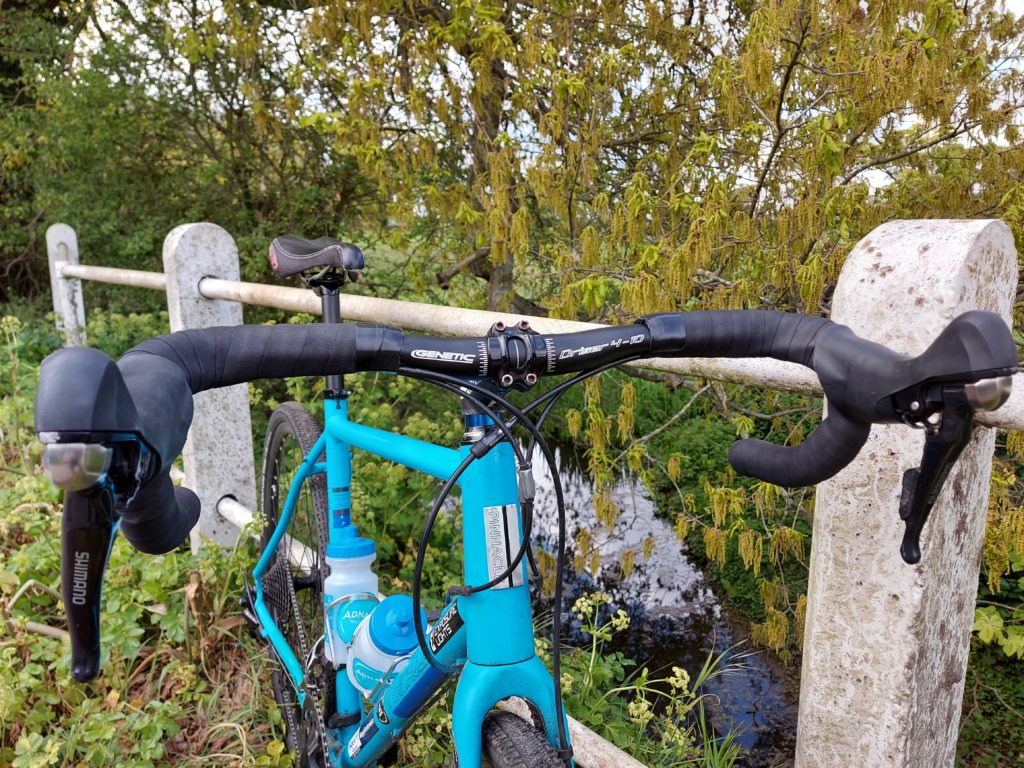
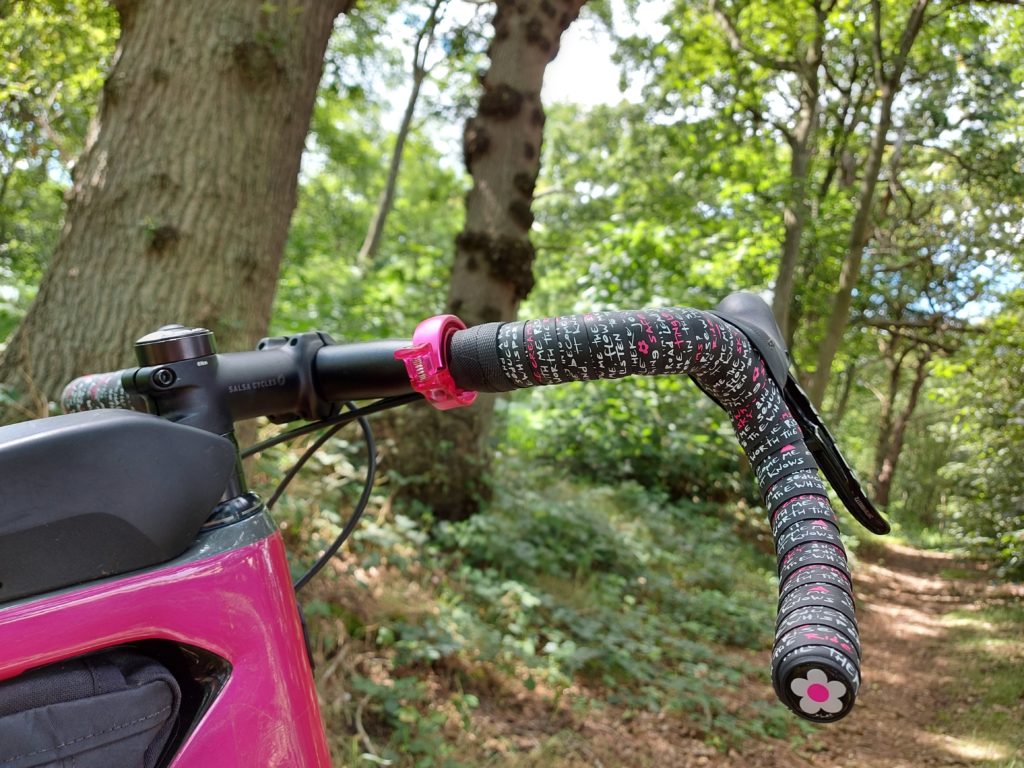
The pattern helps with spacing your wrap precisely while still being different on every turn. The rolls are generously long and I had no issues wrapping the 44cm wide Salsa Cowchippers with their flared drops. The finishing strips are also exceptionally good. All too often the provided strips start to unfurl before you’ve finished wrapping the other side and you make do with electrical tape. Instead Kinesis have provided strips that stick well and feature a knurled grip pattern.

Classic Jo Burt stem cap

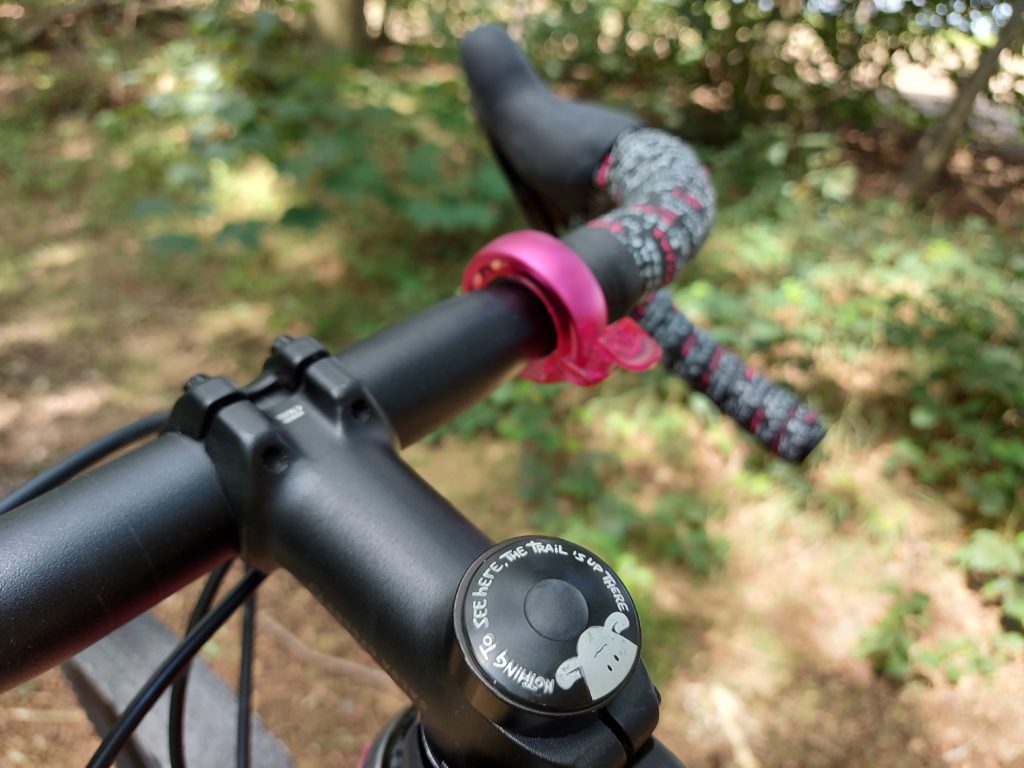
The moment that stem cap has been waiting for has arrived! (not included with the Kinesis bar tape, by the way!)

You like it now but you’ll learn to love it later.

On the bike the tape performs exactly as you’d want it to, grippy, cushioned, easy to clean and hardwearing. Naturally the colours suit the shocking pink Cutthroat we fitted it to, but it’s subtle enough to suit more conservative paint jobs. The asking price of £25 is a fair reflection of the tape’s quality and ease of fitment. But of course, for some of us the appeal of this tape isn’t just how it works physically.

While nostalgia ain’t what it used to be, a quick glance at the bars is all it takes to unearth a wry smile and a burst of 90s energy.

Tuesday, 14 July 2020

Review: Cirrus Cycles Kinekt 2.1 suspension seatpost


Cirrus Cycles Kinekt

It’s rare that a rider, of any genre of cycling, hasn’t at some point suffered the proverbial pain in the arse. If switching saddles, bib shorts or tyre pressures haven’t helped, perhaps a suspension seat post could do the trick? Suspension seat posts have been doing the rounds for years and with varied success. By the mid-noughties, ever evolving and maturing rear suspension frames and fatter low pressure tyres seemed the final nail in their coffin. So for gravel riding, while rear suspension is still a rarity long days in the saddle are not. Could this lead to a resurgence in bouncy seatposts?

Cirrus Cycles Kinekt: Design & Construction

It’s worth noting that Cirrus Cycles do not refer to the Kinekt as a suspension seatpost. Instead they call it an an isolation system as it is undamped. I think most riders however would consider it a suspension post so I’m sticking with that term! Suspension seatposts generally fall into two basic designs, those that resemble a suspension fork leg or dropper post, and those that use a pivoting parallelogram.

The Kinekt is of the latter style and uses a pair of coil springs and elastomer washers to suspend the rider. There are four different sets of springs to allow for different rider weights between 46 and 145kg . Depending on how deep your pockets are, the Kinekt can be had with either alloy or carbon posts. Ours is the alloy version in 27.2 diameter and 350mm in length and weighs in at just over 500 gms. Depending on the standard post you’re replacing, it’s likely you’re adding 250g in weight to your bike. By its very nature the Kinekt is a layback post and the design sets the saddle back 12mm.

Cirrus Cycles Kinekt seatpost showing the preload adjustment

Preload on the Cirrus Cycles Kinekt is adjusted via the allen bolt and checked against printed guide and marker

Cirrus Cycles Kinekt: Installation & set-up

The Kinekt is available in the most common seat post diameters, and in lengths ranging from 330 to 420mm depending on diameter and post material.  On top of the suspension, sorry, isolation system is a two-bolt seat clamp. This cleverly uses a sprung mechanism to secure the two halves of the clamp. Fitting the saddle is a doddle with no risk of fasteners going astray.

Compared to setting up suspension forks, the Kinekt is an uncomplicated process.  You simply adjust the preload with an allen bolt and a guide on the bottom linkage measures sag. The instructions from Cirrus advise you to set the post 1 cm higher than normal to account for sag. From there on you simply adjust the preload until you are happy with the feel while riding.

Performance in use

I’m at the lower end of the weight range for the springs that came fitted in the Kinekt. I found the range of adjustment to be quite small and struggled to find a sweet spot between bottomed out and locked solid. In the end I backed the bolt off a fraction of a turn until it allowed travel.

While riding, if you deliberately head for a rough patch you can definitely feel the post moving and the edge taken off the jolt. The problem I found was that the saddle constantly bobs while pedalling, and it’s particularly noticeable on smooth surfaces. Referring back to the Kinekt’s instructions doesn’t provide a solution, it basically says “you’ll get used to it eventually”. Oh.

Intrigued by the idea of a full-suspension gravel bike I also fitted a Redshift shock-stop stem in tandem with the Kinekt and headed out for the lumpiest sun-baked ruts. While both units seemed to offer similar levels of comfort the shock-stop does so in a less obvious way, you don’t feel like you’re moving vertically.

Front view of the Cirrus Cycles Kinekt suspension seatpost

There’s no getting away from the ‘unconventional’ looks of the Kinekt post!

Cirrus Cycles Kinekt: Summary

For me the Cirrus Cycles Kinekt was a dud, there are just too many negatives outweighing the occasional boost in comfort. My inability to tame the constant pedal-bob brought back unwelcome memories of mountain bikes from twenty years ago. So while the 35mm travel Kinekt does isolate you from some shocks, anything serious and you’ll rise from the saddle rendering it useless.

The Kinekt is expensive for a product with underwhelming performance and a fairly hefty weight gain. The test period has been blessed with good weather, but in poor conditions I’m not optimistic about the fate of mechanism sitting right in the path of rear wheel spray. Furthermore popping your seatpack on effectively could prove tricky.

If you do suffer discomfort while riding I strongly suggest that you experiment with saddle designs, tubeless tyres and quality bib-shorts instead. Lastly, there’s no getting away from the looks. At the risk of appearing shallow the Kinekt does not look appealing, something could be forgiven if the performance was stellar.

Monday, 15 June 2020

Review: Camelbak Repack LR 4 hydration waistpack


I have a history with Camelbak product that stretches all the way back to the early-90s original. Along the way I’ve worked my way through the Rogue, H.A.W.G and Cloudwalker. In recent years however I’ve been getting less use out of them. A combination of constantly evolving bike bags and bikes with umpteen bottle cages have made the rucksack capacity Camelbak less of an essential. So if your frame bag has robbed you of bottle cage space, the Camelbak Repack LR might just be what you’re looking for…

It’s not a bumbag

The Repack LR is a waistpack that’s part of Camelbak’s LR, or Low Rider range. As the name suggests, they all store their water at waist level. If like me you haven’t bought a new Camelbak in years then you’re in for a surprise! The faff of filling/drying a bladder has been greatly reduced with the new design. The hose can be removed with a quick-link while the bladder remains watertight. There is also a handle integrated into the filler cap mouth. If you’ve ever struggled to fill up at an outside tap and keep the mouthpiece out of the dirt you’ll appreciate this setup.

The Repack’s reservoir can store 1.5 litres (or 50 oz in old money) of water, comfortably matching a pair of bottles then! The bite-valve features an on/off valve and even when on no amount of rough riding lead to any leakage. The hose clips to the pack’s belt using a magnetic tube-trap. To begin with I found this tricky to replace when on the move but it soon becomes second nature. It’s certainly less trouble than trying to replace a bottle into a cage under a frame bag or on a fork leg!

Crux resovoir

The Crux reservoir, holding water with the hose removed!

There are handy pockets on both sides of your hips. On the left a zipped one that was perfect for keys and on the right one with just elastic and an overlapping flap. While I could happily fit a 700c innertube in them there was no way they’d take a modern smartphone. Both sides of the belt have the same ladder-stitched strapping so you can switch the hose-clip to the whichever side you prefer.

Hydration bite valve

Secure hose retention and handy zipped pocket

Comfort

Another clever feature of the belt is that the main strap passes under  the pockets. Whatever you’ve got stored won’t interfere with or get crushed if you cinch the belt tight. Another upside is that I found the Repack to stay in place with a relatively loose belt. There was no need to cinch the belt so hard you give yourself a beer-belly look-alike! The Repack stays put both when spinning a fast cadence or bashing down sun-baked ruts. There is plenty of padding around the lumber and belt and perforations prevent an excessively sweaty feel.

Camelbak Repack

Elasticated pocket for quick-access for bulkier items, but not your phone…

Further storage

Inside the main compartment there is a central divider to separate the space for the water and other kit. Undoing the zip creates a wide opening so getting the reservoir in is a piece of cake. With the full 1.5 litres on board there’s an additional 2.5l for kit. Room enough for a tool roll and mini-pump without forcing the zips. There is an additional small pocket under the camelback logo. Inside are a series of dividers (So I could do away with the tool-roll!) and a zipped mesh pocket with a key-clip. The exterior zips move horizontally so the pocket opens like a book and velcro flap ensures the zip-pulls can’t catch and pull open inadvertently.

Camelbak Repack

Room for all the essentials in the Camelbak Repack

Camelbak Repack: Summary

I found the Camelbak Repack to work really well for a number of scenarios. For quick rides it holds all the essentials, and on longer rides it increases your overall capacity, conveniently returning what has been lost through fitting a frame bag. Compared to a rucksack there’s no sweaty-back or shoulder ache to contend with. The Repack can also be spun-around to access the pockets without having to remove it, handy for grabbing your camera or a snack in a hurry. The clever design shows Camelbak haven’t been resting on their laurels, if only the side pockets could take my phone! All said, the Repack looks set to join me on a lot more adventures in the future.

Camelbak Repack

The silver-loop is reflective and can take a clip-on light

Wednesday, 3 June 2020

Review: Genetic Driser 4-10 drop handlebars


Genetic Driser 4-10

Drop-what?

25 years on from riser-bars having their second coming on mountain bikes, Genetic have released their new Driser 4-10 drop-bars. Joining the original Driser 4 road  and Driser 16 gravel bars there is a clear family resemblance. In common with its predecessors, the Driser 4-10 is a drop-riser, that is to say a drop bar with a rise on the top section. At first this seems counter-intuitive but there are situations where this could come in handy. Perhaps to get comfy you need more height than your steerer can accommodate, or perhaps you just want to avoid the huge stack-o-spacers look.

Paired with gel-pads the drisers are a seriously comfy bar

On the bike

The 4-10 part of the Genetic Driser name relates to the 4 degree flare on the drops and the 10mm rise from the centre. The original Driser shared the same flare but came with a 20mm rise. Another way that Drop-bars are aping MTB trends is by getting wider. The Genetic Driser 4-10 is available in five widths from 400 to 480mm in 20mm increments.

The tops of the Drisers are an interesting shape. Normally you’d refer to it as aero, but that’s probably not the biggest concern for someone hoping to raise their bars! I tried our test set with some gel-pads and it made the drisers almost a replacement for flat handlebars. The 4° flare seems tame compared to  a Woodchipper, but adds 16mm width on the drops. So for an Audax, back-roads bash or gravel-lite© it’s enough to help your elbows flex outward. The drisers are made from 6061 alloy and (even without the gel pads) didn’t feel overly harsh or excessively flexible.

Genetic Driser 4-10

Roomy & practical with a hint of flare!

Aside from ride feel the drisers have another couple of handy features. There are channels underneath to help recess the cables and also maintain a comfy shape when gripped. The semi-aero flat-tops leave a bit more room for GPS & light mounts, useful for bars that aim to help you stay out longer! At £44.95 the Drisers compare favourably to rivals and offer a broader width range. If you have some big rides planned, or a bike that’s too compromised for regular use, the drisers could be the bars to open up your options.

Specifications

  • 6061 Aluminium tubing
  • 40/42/44/46/48 cm Widths
  • 10mm rise
  • 70mm reach
  • 4° Flare
  • 115mm drop
  • 31.8mm stem clamp diameter
  • 23.8mm main tube diameter
  • Laser etched logos on a sand blasted and black anodised finish

Tuesday, 2 June 2020

Review: Giro Agilis MIPS helmet


As gravel bikes straddle the middle ground between road & mtb, the associated kit begins to do the same. Road helmets ache to be aero while MTB lids sprout peaks and chin guards. If like me you’re unlikely to be putting out some serious wattage at the DK200, your priorities are different. Decent ventilation, and some additional protection as an off-road tumble is always more likely than on smooth black-top. The Agilis MIPS from Giro is aimed squarely at the all-road market looking for this blend of speed & safety.

Construction

The Giro Agilis helmet uses the familiar polystyrene construction you’ll find in most helmets. The first thing that stood out to me was that none of the outer faces of polystyrene are exposed. So scuffs and dents from daily use will be fended off by a tougher polycarbonate shell. This can only help the helmet’s longevity.

Giro Agilis

Why so serious?

Fit & comfort

As we say in all our helmet reviews, any comments on fit have the caveat that all human heads are different shapes. One thing that everyone can probably agree on is that good ventilation is a must. Here the Giro Agilis does well, and in the pics below you can easily see both my head, and some daylight through the vents. These combined with the generous foam pads meant that when working up a sweat it doesn’t run into your eyes. Another aspect of fit that thankfully has been important of late is compatibility with sunglasses! My Oakley Monsterdogs have the chunkiest frames of all my sunnies and play nicely with the Agilis. Neither push each other lopsided when worn together!

Giro Agilis

Good ventilation and clearance for big sunnies!

Adjustment

Looking inside the Giro Agilis you can see the Roc Loc 5.5 MIPS cradle. For those of you unfamiliar with MIPS it’s a system that aims to reduce rotational brain injuries. Once the main body of the helmet has absorbed the initial impact the MIPS liner allows your head to rotate within the helmet. This is particularly important when your head hits something at an angle. Let’s face it, you’re unlikely to hit anything perfectly on the level. Of course I can’t verify the effectiveness of MIPS, what I can do is say that the system doesn’t make the helmet uncomfortable or more difficult to adjust. In fact I was hugely impressed by the level of comfort offered. The straps are easy to adjust and stay put while the Roc Loc adjuster has enough fine-tuning to allow a custom fit. Crucially I could adjust the Agilis so that it stayed in place without feeling like my skull was being compressed!

MIPS view of Giro Agilis

Excellent adjustment, and comfort without bulk.

Summary

The Agilis was a hit from the get go. It’s comfortable, light, and very easy to adjust. The Agilis mixes the best of road & MTB helmets without compromise. The best helmet is perhaps the one you don’t notice and you’re happy wearing. Retailing at £89.99 I feel the Agilis represents good value for money, considering the excellent fit, finish and MIPS cradle. If you like the design of the Agilis MIPS but aren’t convinced by the MIPS system then a standard Agilis is also available. It retails for £69.99 and comes in the same seven colourway options. Personally, spreading that additional £20 across the many hours I’ll wear this helmet for makes the extra expense a no-brainer. Ahem.

It’s also worth mentioning that currently Giro are supporting NHS & key workers by offering a 30% discount off their range of products. You can read more about it HERE.

Rear view of the helmet

The Agilis extends lower than your average road lid

Tuesday, 19 May 2020

Cool movie! INTO THE RIFT: THE STORY OF THE ATLAS MOUNTAIN RACE


The Atlas Mountain Race

At its announcement the Atlas Mountain Race had all the hallmarks of being an amazing event. So much so I barely hesitated putting my name down when entries opened! With the covid-crisis going global shortly after the AMR, what was a contender for the event of the year, might end up being the only big event of the year! With terrain that was as beautiful as it was punishing, the AMR has undoubtedly burned itself indelibly into the memories of those who competed. Even so, with the events that have unfolded across the world, the freedom of ride, eat, sleep, repeat seem a distant memory.

A film by Brady Lawrence

It is fortunate then that Brady Lawrence was invited to film the event. And in doing so, open up the rider’s experiences to a wider audience. The film’s producers sent us this to outline what you can expect in the movie:

To simply finish the Atlas Mountain Race means navigating 1,200 kilometres of the most rugged and remote roads in Morocco. Along forgotten gravel paths from Marrakech to the Atlantic coast, riders must climb a staggering 25,000 meters of elevation past snow-capped peaks, through scorched desert and into palm-filled oases. All under the eight-day time limit.


To win requires riding almost non-stop, night and day, for days on end. It is a combination of strength and sleep deprivation that only a few riders in the world can manage. Riding alone, unsupported and loaded down with supplies, each competitor must constantly battle mechanicals, heat exhaustion and saddle sores to get to the finish. There is no prize, no money, simply the satisfaction that comes from pushing oneself to the limit while exploring the backroads of a beautiful country.


With support from Canyon in conjunction with PEdALED, Fizik and the race crew led by organiser and route creator Nelson Trees, filmmaker Brady Lawrence followed the race documenting everything from a brutal 80 kilometre walk through the high desert with a broken bike, to one racer’s simple joy at realising they’ll soon eat their first warm meal in days.


Featuring the sport’s biggest names and first-time, ultra-distance racers alike. Into the Rift gets up close to the kind of people crazy enough to take on this epic challenge. Capturing the human drama set against an otherworldly landscape, Into the Rift is an in-depth look at a true adventure.

Into the Rift

Into the Rift: The Story of the Atlas Mountain Race. Debuts on May 20, 2020 at 20:00 UK time (21:00 CET) on YouTube.

Click here to watch Into the Rift

Into the Rift: The Story of the Atlas Mountain Race

Monday, 11 May 2020

Bikepacking movie: Salsa Cycles: Choosing To Live

 Finally the wait is over! Salsa Cycles and Travel Alberta‘s new movie, Choosing To Live, is ready to stream online.

While mourning her late husband, Sarah Hornby craved an opportunity to connect with him through his biggest passion. Her goal was simple. She would attempt all 10 routes he created while researching his Bikepacking in the Canadian Rockies guidebook, in a single year. As she pedaled, her story transformed. From sadness and loss to a profound celebration of both his life and her own unique journey, she was choosing to live.

Choosing to Live, Salsa Cycles

Sarah Hornby, ticking off the routes of the guidebook.

A Salsa Cycles movie is always greatly anticipated. Choosing To Live, made in conjunction with Travel Alberta, is no different. It documents routes in the Canadian Rockies laid out by inspirational bikepacker and cycle racer Ryan Correy. Correy, the founder of Bikepack Canada, tragically lost his fight with cancer in April 2018, aged only 35.

His last project was to write Bikepacking in the Canadian Rockies, the definitive guidebook for the area he loved to explore most. Choosing to live records his wife, Sarah Hornby as she rides each of the routes laid out in the guidebook in a single year.

Salsa Cycles: Choosing to Live

More Info…

For more information on Salsa Cycles, visit their website: salsacycles.com

Check out Travel Alberta to start planning your dream holiday at: travelalberta.com

Salsa Cycles - Choosing to LiveChoosing to Live trailer photoOn the road in AlbertaSalsa Cycles - Choosing to LiveSalsa Cycles - Choosing to Live